Mouse jigglers are widely used in IT and other fields to keep a computer awake for various reasons, from preventing a screensaver from activating during a presentation to keeping a system active for a forensic investigation.
In this article, we’ll look at how to use the Digispark ATTINY85, a budget-friendly development board powered by an ATtiny85 microcontroller running at 16 MHz, with 6 KB of usable flash memory. This versatile board connects via USB and can be programmed for diverse tasks, including simulating mouse movements or even injecting keystrokes—ideal for creating a homemade mouse or keyboard hardware jiggler with advanced functionality.

When you get your Digispark it will look similar to the picture, for this project we will not be using header pins and we will be programming the device through USB header.
- The first step of programming the Digispark is downloading the latest Arduino programming IDE.
https://www.arduino.cc/en/Main/Software
- Next is downloading and installing the Digispark drivers. You may need to accept multiple notifications through the install process.
https://github.com/digistump/DigistumpArduino/releases
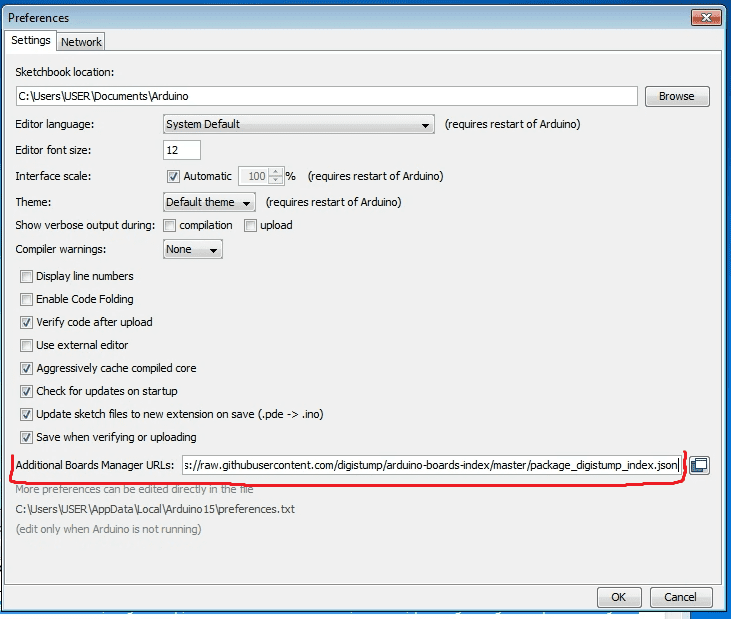
- Once both the Arduino IDE and Digispark drivers have been installed, add the digispark JSON configuration file to the IDE. This is done by opening the Arduino IDE, clicking on ‘File, Preferences’ and adding the following URL into the ‘Additional Boards Manager URL’s’ box, then click ‘OK’. https://raw.githubusercontent.com/digistump/arduino-boards-index/master/package_digistump_index.json

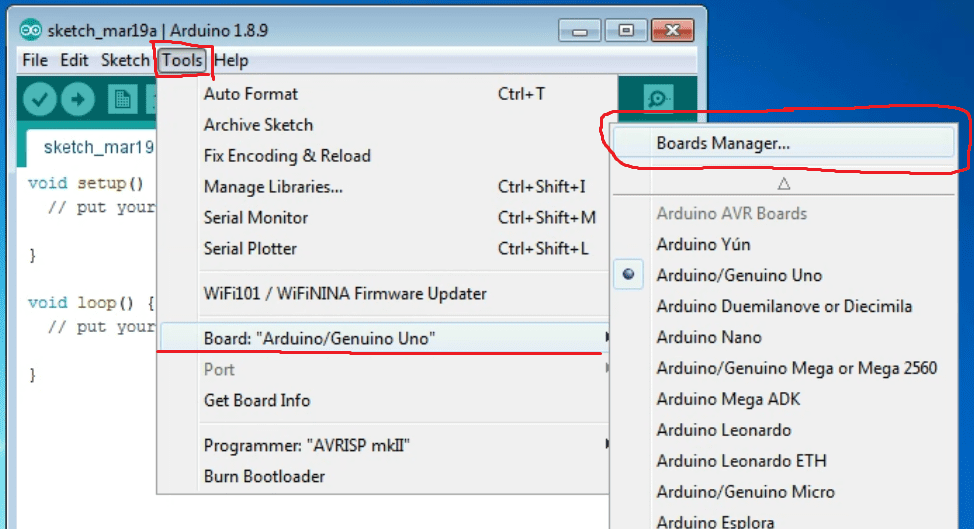
- Once installed, go-to Tools –> Board and select “Board Manager

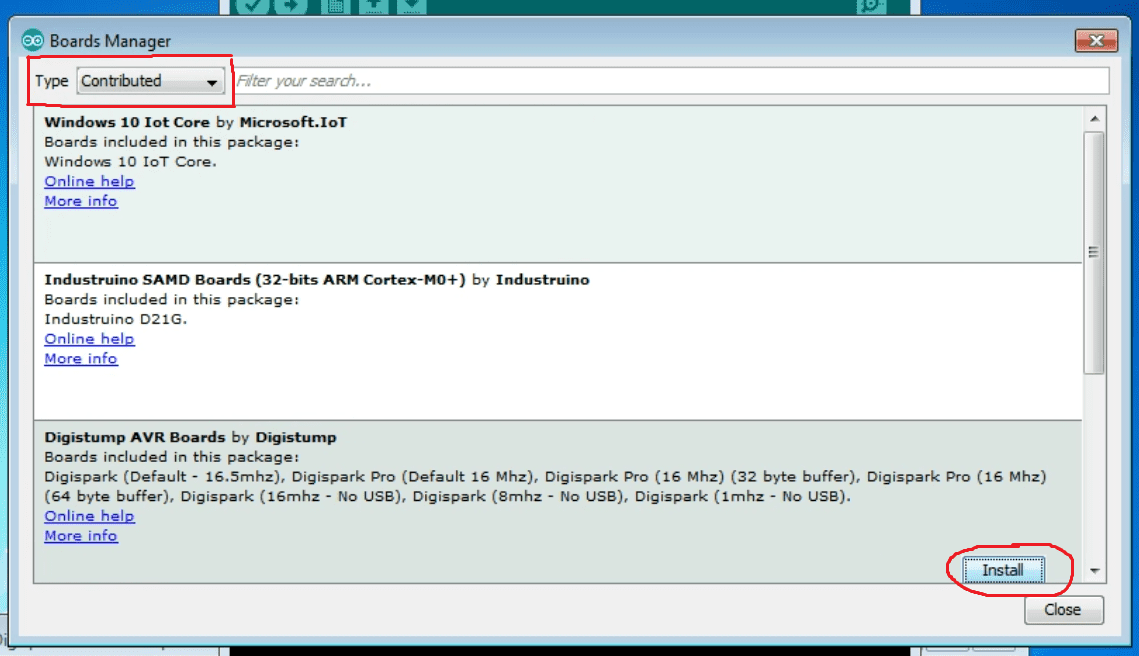
- In the top left hand corner change the Type to “Contributed” and click the install button on the “Digistump AVR Boards by Digistump package”. This will allow the Arduino IDE to program the Digispark controllers.

- Once installed, go-to Tools –> Board and select “Digispark – Default 16.5mhz”. This set’s the IDE to compile the code for the Digispark board.

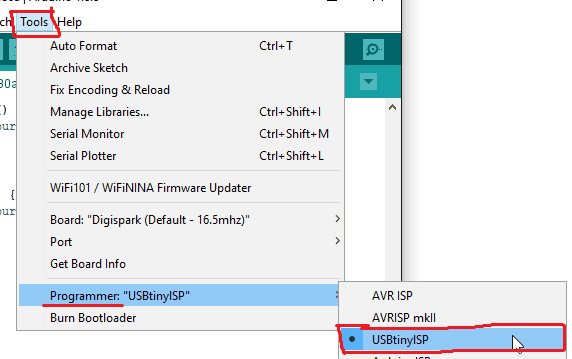
- Next go-to, Tools –>Programmer and set it as “USBtinyISP”

- We have created an opensource simple Mouse Jiggler sketch (program) for the Digispark v3 which moves the cursor every 10-30 seconds in a square pattern. Download and open it in Arduino IDE.
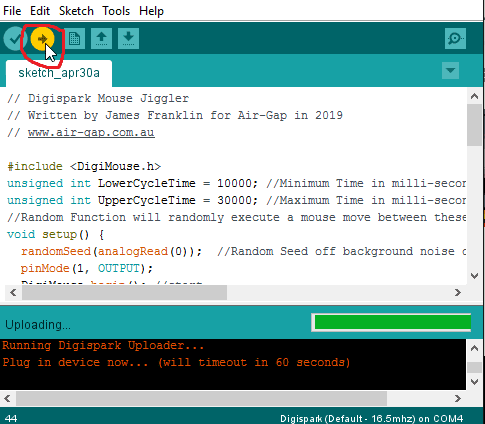
Download: MouseJiggler.ino - Click on the “Upload” button to compile the sketch and upload it to the Digispark.

- If successful, you should now see the Digispark flash every 10-30 seconds to indicate a ‘mouse jiggle’. The mouse movement should be near undetectable.
We hope you you enjoyed this post. If you did please leave us a comment below.
This article was originally hosted at: https://air-gap.com.au/how-to-make-a-mouse-jiggler-with-digispark/
Originally Published: April 30, 2019


